
Positioning the battery cabinet
 Qualified person
Additionally required mounting material (not included in the scope of delivery):
Two suitable screw anchors for attaching the battery cabinet to the wall
Two suitable screws for attaching the battery cabinet to the wall
Procedure:
- At the desired installation site, mark two drill holes for attaching the battery cabinet to the wall.
- Drill holes at the marked positions.
- Use screw anchors that are suitable for the support surface.
- Remove packaging and transport locks from the battery cabinet.
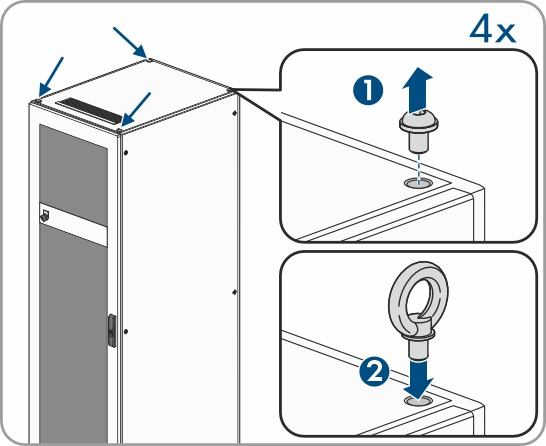
- To transport the battery cabinet with a crane, remove the four fastening screws (TX55) on the cabinet cover and attach the four supplied eye bolts to the battery cabinet.
- Transport the battery cabinet to the desired installation site.
- If eye bolts are installed, remove them and reinsert the two fastening screws on the front of the cabinet (TX55).
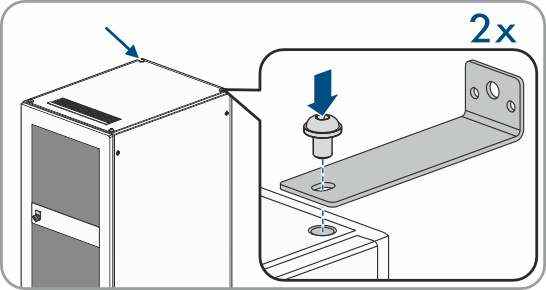
- Attach the supplied fixing brackets to the cabinet cover. Use two of the four fastening screws on the cabinet cover for this.
- Tighten all fastening screws on the cabinet cover (TX55, torque: 20 Nm to 35 Nm).
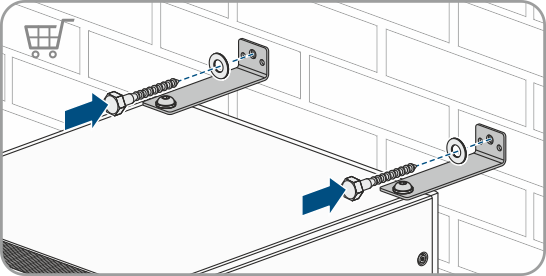
- Attach the battery cabinet fixing brackets to the wall. Use two screws suitable for the mounting base for this.
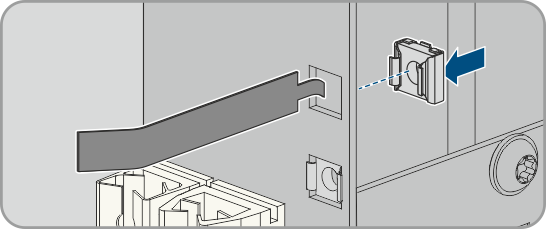
- For each mounting level in the battery cabinet, attach four of the supplied cage nuts to the sliding rails.
- Attach the type label to a side panel on the battery cabinet where it will be clearly visible.
- Attach the battery room label to the access door for the battery room where it will be clearly visible.
Also see: