
Wall Mounting
 Qualified person
Requirements (not included in the scope of delivery):
Prior to installing the wall mounting bracket, consider the possible cable route
Four screws (6 mm diameter) suitable for the support surface and the weight of the charging station
4 washers suitable for the screws
Where necessary, 4 screw anchors suitable for the support surface and the screws
CAUTION
Risk of injury due to weight of product
Injuries may result if the product is lifted incorrectly or dropped while being transported or mounted.
- Transport and lift the product carefully. Take the weight of the product into account.
- Wear suitable personal protective equipment for all work on the product.
Procedure:
- Disconnect the miniature circuit breaker for all line conductors and secure against reconnection.
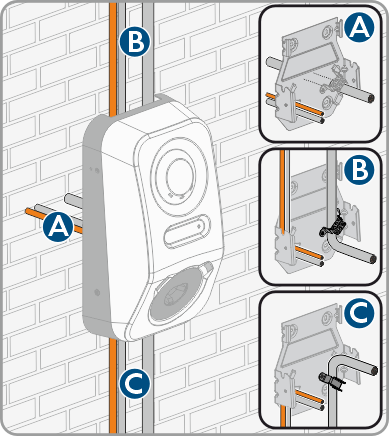
- There are three options for routing the AC connection cable and the communication cable to the product (top, bottom, and rear). Decide on one option before drilling.
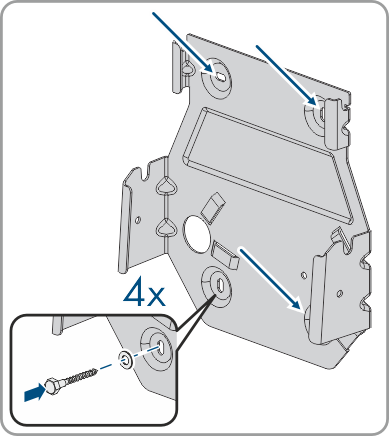
- Align the wall mounting bracket horizontally on the wall and mark the position of the drill holes.
- Set the wall mounting bracket aside and drill the marked holes.
- Insert screw anchors into the drill holes if the support surface requires them.
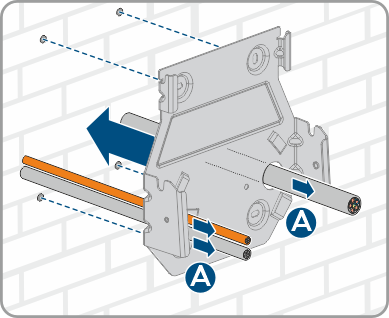
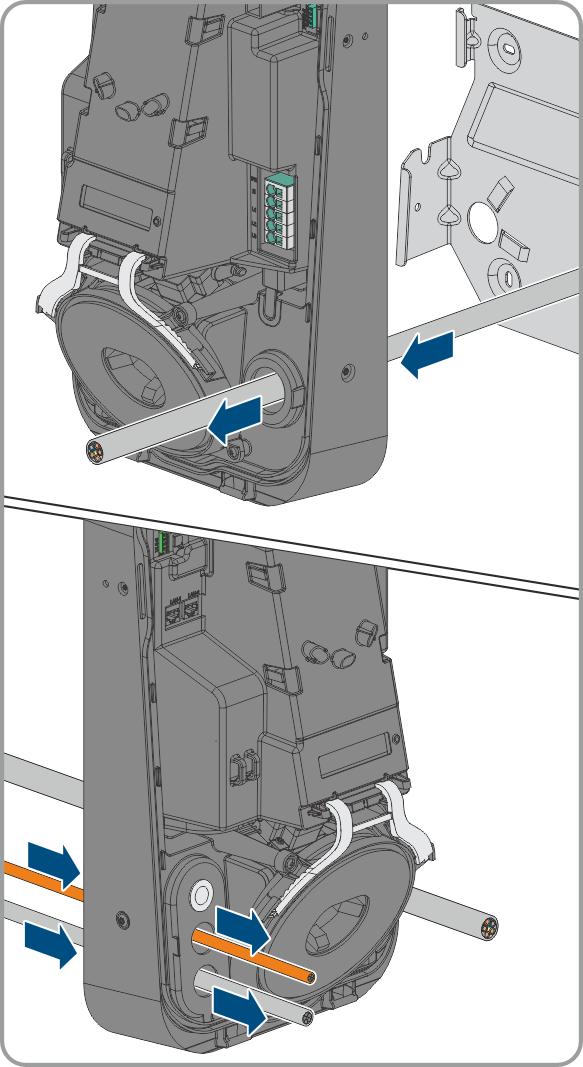
- For option A, run the AC connection cable and the communication cable through the wall mounting bracket and position the wall mounting bracket above the drilled holes.
- Secure the wall mounting bracket horizontally using screws and washers.
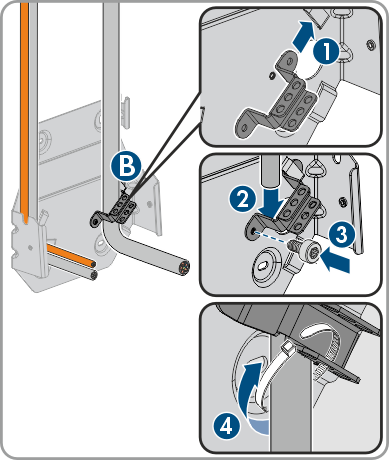
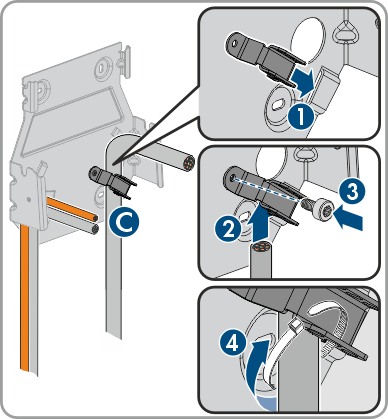
- For option B, run the AC connection cable through the provided strain relief from above. Secure the strain relief using the included screw (M5 x 8) (T25, 3.5 Nm tightening torque) and then attach the AC connection cable to the strain relief with a suitable cable tie.
- For option C, run the AC connection cable through the provided strain relief from below. Secure the strain relief using the included screw (M5 x 8) (T25, 3.5 Nm tightening torque) and then attach the AC connection cable to the strain relief with a suitable cable tie.
- Cut the AC cable to 350 mm and the communication cable to about 490 mm.
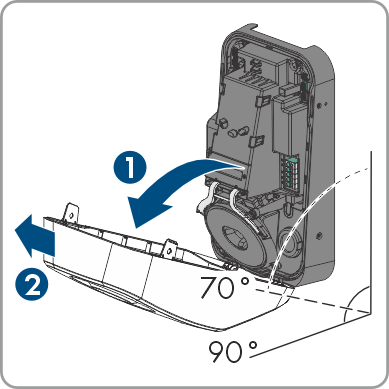
- Release the locking tabs at the top of the cover of the enclosure with a suitable tool (<Ø 5mm).
- Tilt the cover forward to an angle of about 70° and then carefully pull upwards to remove it.
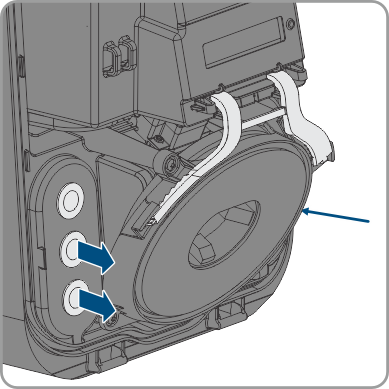
- Remove the number of filler plugs needed to run the cables into the enclosure opening.
- Run the AC cable through the enclosure openings on the right, and run the communication cable on the left.
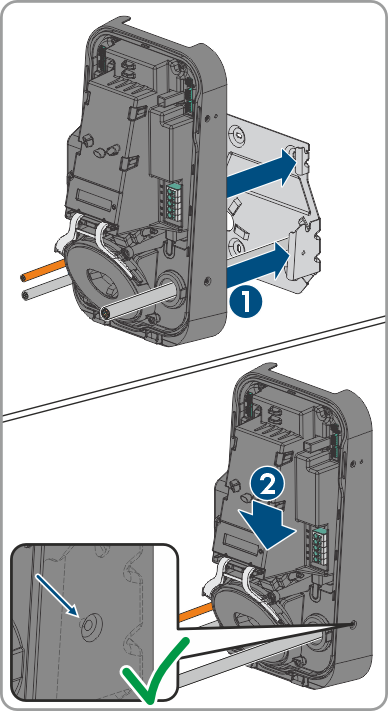
- Place the enclosure horizontally on the wall mounting bracket and press it downward lightly.
- Make sure that the charging station is securely attached. The charging station is correctly hooked in when the indentations in the wall mounting bracket and the mounting tab line up.
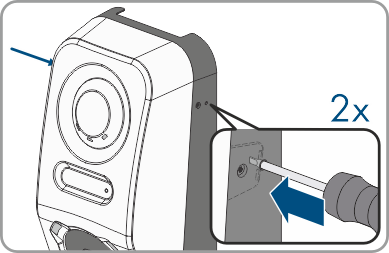
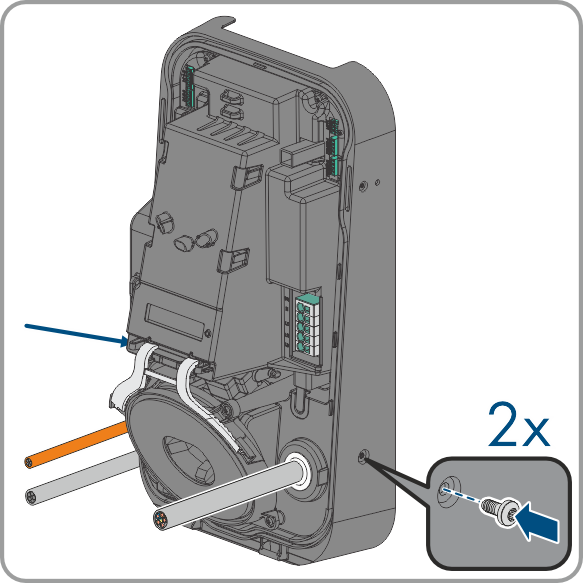
- Secure the enclosure on both sides with a flanged pan head screw (M5x12) provided. To do so, insert screws into the screw holes on the left and right sides of the enclosure and tighten them (TX25, tightening torque: 2.2 Nm).
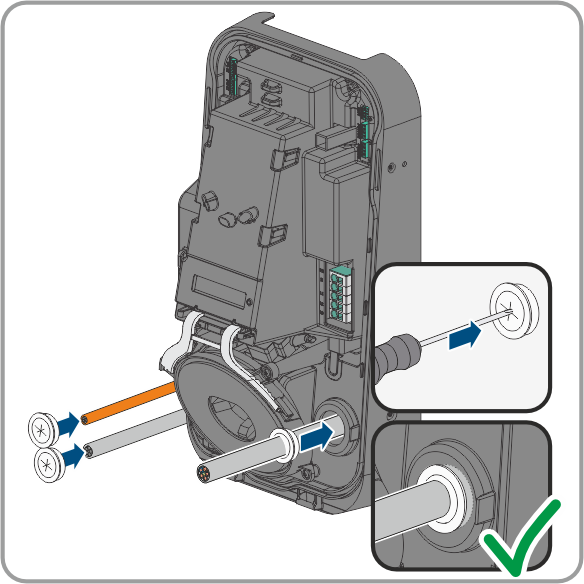
- Use a suitable tool to puncture the filler plugs and run the AC cable and the communication cable through. Make sure that the filler plugs are in the right position and that no moisture can penetrate into the product.
- Make the electrical connection ( > Electrical Connection).

See also the following video for additional information: | |
|---|---|
TechTip: SMA eCharger Installation I DE |
|
TechTip: SMA eCharger Installation I EN |
|


Also see: