
Connecting the PV Array
 Qualified person
NOTICE
Damage to the product due to ground fault on DC side during operation
Due to the transformerless topology of the product, the occurrence of ground faults on DC side during operation can lead to irreparable damage. Damages to the product due to a faulty or damaged DC installation are not covered by warranty. The product is equipped with a protective device that checks whether a ground fault is present during the starting sequence. The product is not protected during operation.
- Ensure that the DC installation is carried out correctly and no ground fault occurs during operation.
Procedure:
- Disconnect the inverter from all voltage sources ( > Check that the inverter is de-energized).
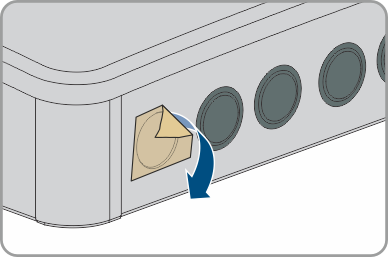
- Remove the adhesive tape from the enclosure opening for connecting the PV modules to inputs A and B.
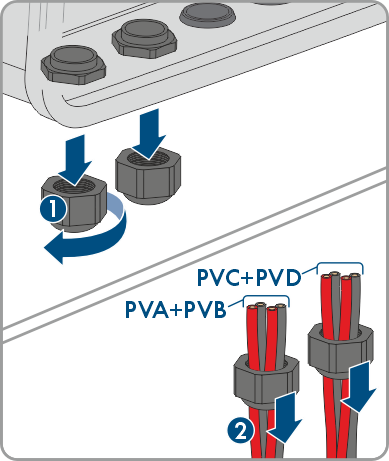
- If more than 2 strings are connected, remove the filler plug from the second enclosure opening from the left.
- Depending on the number of strings available, insert 1 or 2 M32x1.5 cable glands with four-hole cable support sleeve into an enclosure opening for connecting the PV modules and tighten them from the inside with the counter nut.
- Unscrew the union nut from each cable gland and run it over the DC cables. Depending on the power class, run the cables for PVA and PVB together through a union nut and cable gland, and the cable for PVC and, if applicable, PVD through another union nut and cable gland.
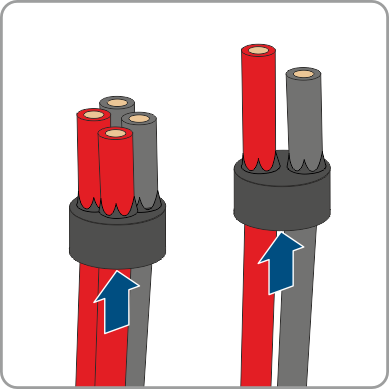
- Remove the four-hole cable support sleeve from the cable gland.
- Plug the DC cables into one enclosure opening in each of the four-hole cable support sleeves. In doing so, pierce the closed side of the enclosure opening.
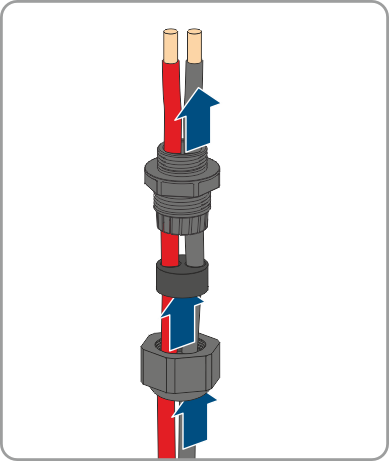
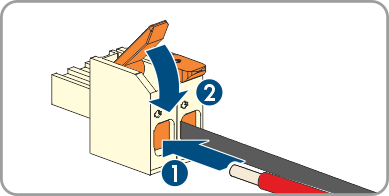
- Strip the insulation of the DC cables by approx. 12 mm.
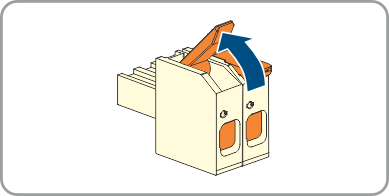
- Push up the levers on the terminal blocks for connecting the PV modules.
- Connect the DC cables to the terminal blocks for connecting the PV modules. To do this, insert the conductor and push down the lever.
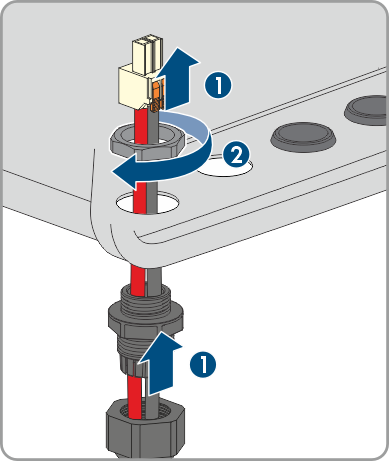
- Feed the DC cable through the enclosure opening and then through the nut of the PG cable gland.
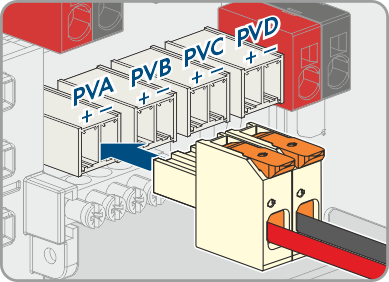
- Plug the terminal blocks onto the PVA, PVB, PVC and, if applicable, PVD slots.
- Firmly hand-tighten the swivel nuts of the cable glands.

Also see: