Connecting the DC Power Cable
 Qualified person
Additionally required material (not included in the scope of delivery):
Ethanol
2 terminal lugs M8, 20 mm to 25 mm wide
Cable requirements:
Conductor cross-section: 50 mm² to 95 mm²
Cable diameters: 14 mm to 25 mm
Only copper cables may be used.
The DC cables must be sized for the maximum battery voltage and the maximum battery current (see battery manufacturer documentation).
WARNING
Danger to life due to incompatible lithium-ion battery
An incompatible lithium-ion battery can lead to a fire or an explosion. With incompatible lithium-ion batteries, it is not ensured that battery management is intrinsically safe and will protect the battery.
- Ensure that the lithium-ion batteries are approved for use with the Sunny Island (see technical information “List of Approved Batteries” at www.SMA-Solar.com).
- If no lithium-ion batteries approved for the inverter can be used, lead-acid batteries can be used.
- Verify that the battery complies with locally applicable standards and directives and is intrinsically safe.
Procedure:
- Ensure that the load-break switch of the battery fuse is open and secured against reconnection.
- On the Sunny Island, remove all screws of the lower enclosure lid using an Allen key (AF 5) and remove the enclosure lid. Retain the screws and conical spring washers for later use.
- Attach two M32 cable glands with counter nuts included in the scope of delivery to the DC+ and DC− enclosure openings (torque: 12 Nm).
- Clean the contact surfaces of the connections DC+ and DC- using a clean cloth and ethanol cleaning agent and do not touch the contact surfaces after cleaning.
- Use the required terminal lugs when connecting the DC cables.
- Ensure correct polarity when connecting the DC cables.
- Connect the DC cables as described in the following.
- Strip off the insulation of the DC+ cable and mount a terminal lug.
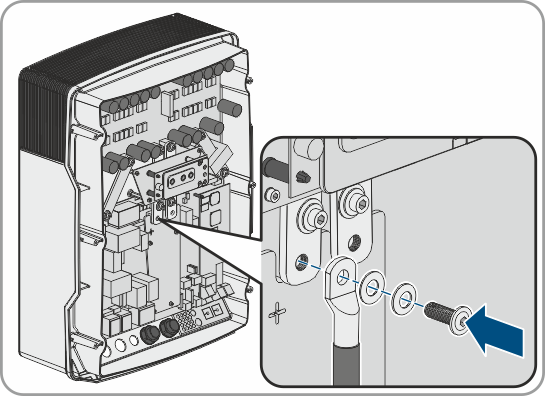
- Route the DC+ cable on the side of the protective cover marked with a + symbol.
- Use an Allen key (AF 5) to fasten the DC+ cable to the DC+ connection with an M8x20 pan head screw (torque: 12 Nm). Be sure to adhere to the following screw assembly: screw head | spring washer | fender washer | terminal lug | DC connection.
- Ensure that the entire contact surface of the fender washer is in contact with the terminal lug.
- Strip off the insulation of the DC- cable and mount a terminal lug.
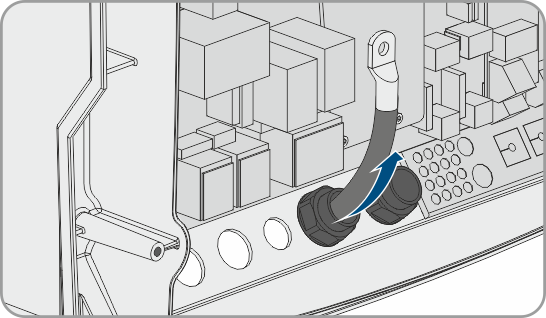
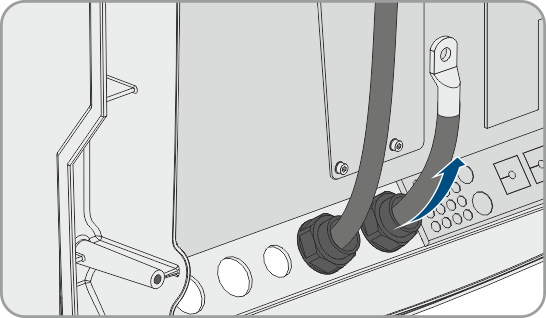
- Thread the DC- cable through the DC- cable gland into the Sunny Island.
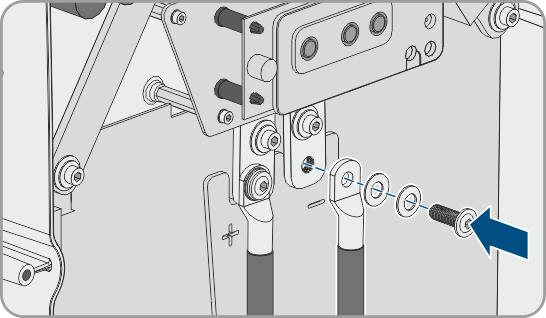
- Route the DC- cable on the side of the protective cover marked with a - symbol.
- Use an Allen key (AF 5) to fasten the DC-cable to the DC- connection with an M8x20 pan head screw (torque: 12 Nm). Be sure to adhere to the following screw assembly: screw head | spring washer | fender washer | terminal lug | DC connection.
- Ensure that the entire contact surface of the fender washer is in contact with the terminal lug.
- Ensure that the seal insert is positioned correctly in the cable gland.
- Tighten the swivel nuts of the cable glands (torque 4.5 Nm).

NOTICE
Damage to the battery inverter due to excessive electric currents because of the DC cables being incorrectly connected
If the DC cables are swapped or incorrectly connected, dangerously high currents will flow after the load-break switch has closed. These electric currents can damage the battery inverter.