
Disconnecting product connections
 Qualified person
- Disconnect the inverter from all voltage sources ( > Disconnecting the product from voltage sources).
- Wait 30 minutes for the enclosure to cool down.
- Open the cable compartment ( > Opening the Cable Compartment).
- Remove the conductors for AC connection by loosening the hex nuts (AF19) and then removing the ring terminal nuts with the conductors from the threads.
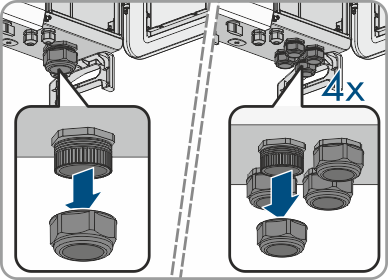
- Loosen the swivel nut on the cable gland for the AC connection on the bottom of the inverter.
- Feed the cable out of the device through the cable gland for the AC connection.
- Route the cable through the swivel nut.
- Tighten the swivel nut on the cable gland for the AC connection.
- Attach the protective cover in front of the AC connection using the 4 screws (PH2, tightening torque: 1.5 Nm).
- Remove the grounding by loosening the screw at the connection points for the additional grounding (PH3).
- Remove the RJ45 plug of the cable from the network jack of the communication assembly.
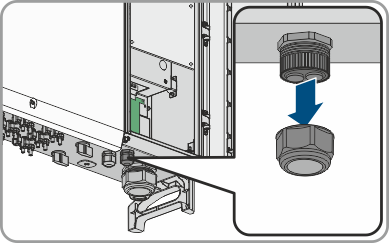
- Remove the swivel nut from the cable gland for the communication cable.
- Feed the network cable out of the device through the cable gland for communication cables.
- Feed the network cable through the swivel nut. For this, remove the two-hole cable support sleeve.
- Tighten the swivel nut on the cable gland hand-tight.
- Move the limiting lever back to its original position and close the cable compartment cover.
- Disassemble the product ( > Disassembling the product).
CAUTION
Risk of burns due to hot enclosure parts
Also see: