Mounting the Product to Profile Rails
 Qualified person
CAUTION
Risk of injury due to weight of product
Injuries may result if the product is lifted incorrectly or dropped while being transported or mounted.
- Transport and lift the product carefully. Take the weight of the product into account.
- Wear suitable personal protective equipment for all work on the product.
- Transport the product using the carrying handles or hoist. Take the weight of the product into account.
- Use all carrying handles provided during transport with carrying handles.
- Do not use the carrying handles as attachment points for hoist equipment (e.g. straps, ropes, chains). Insert eye bolts into threads provided on top of the product to attach the hoist system.
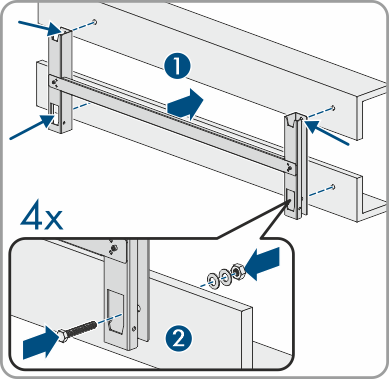
Procedure:
- Screw the bracket parts to the ends of the connecting rod (PH2, torque: 1.5 Nm) using the cheese head screws (M4x10) to mount the mounting bracket.
- Align the mounting bracket using a spirit level and mark the drilling positions on the profile rails.
- Drill the bore holes (Ø 12 mm) at the marked areas.
- Attach the mounting bracket to the profile rails (AF16, tightening torque: 35 Nm) using 4 hex screws (M10x45). In this process, use 1 washer, 1 spring washer and 1 hex nut each.
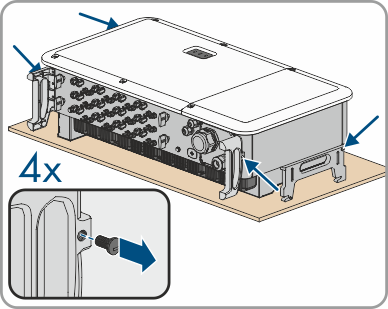
- Remove the sealing screws on the sides of the inverter using a flat-blade screwdriver (4 mm).
- If the inverter is to be hooked into the mounting bracket using a lifting gear, screw the eye bolts into the 2 upper threaded holes on the right-hand and left-hand side of the inverter and attach the lifting gear to them. The lifting gear must be suitable to take the weight of the inverter.
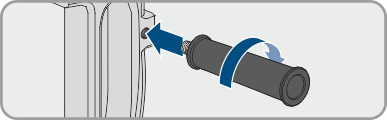
- If the inverter is to be hooked into the mounting bracket without using a lifting gear, screw the carrying handles as far as they will go into the threaded holes on the right-hand and left-hand side until they lie flush with the enclosure. When doing so, ensure that the carrying handles are screwed into the threaded holes so that they are perfectly straight. If the carrying handles are not screwed in straight, this can make it more difficult or even impossible to unscrew them later on and can damage the threaded holes to the extent that carrying handles can no longer be screwed into them.
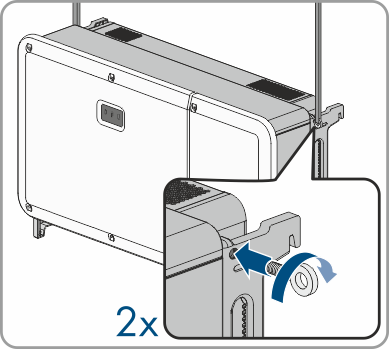
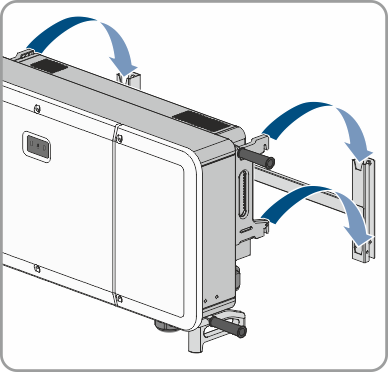
- Hook the inverter into the mounting bracket.
- Remove all 4 carrying handles from the threaded holes or remove the eye bolts of the lifting gear and again screw in the sealing screws using a flat-blade screwdriver (4 mm, tightening torque 2 Nm).
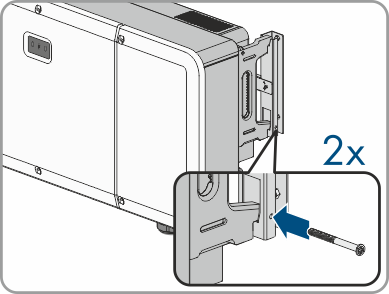
- Use the pan head screws (M5x65) to attach the inverter to the mounting bracket (PH3, tightening torque: 4.5 Nm).