
Disconnecting the Terminals from the Inverter
To decommission the inverter completely upon completion of its service life, proceed as described in this Section.
Procedure:
- Disconnect the inverter from voltage sources and secure it against being switched on againDisconnecting the Inverter from Voltage Sources.
- Wait 30 minutes for the enclosure to cool down.
- Open the cable compartment ( > Opening the Cable Compartment).
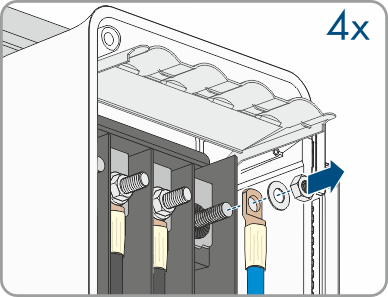
- Open the protective cover.
- Loosen the conductors L1, L2, L3, N with the ring terminal lugs from the threads at the top using a ratchet.
- Loose the grounding conductor and the ring terminal lug using a ratchet.
- Close the protective cover of the cable compartment.
- Move the limiting lever back to its original position and close the cable compartment cover.
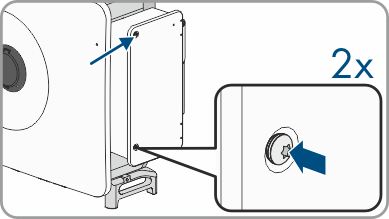
- Tighten the 2 screws on the cable compartment cover (TX30, tightening torque: 4.2 Nm to 4.5 Nm).
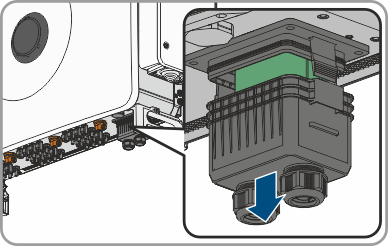
- Remove the union nut of the cable glands for the communication cable.
- Remove the cover from the communication connection area.
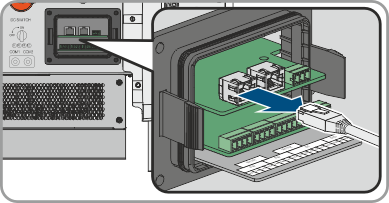
- Remove all connection cables from the communication assembly.
- Remove the connection cable from the cable gland.
- Tighten the union nut of the cable gland to the cover hand-tight.
- Press the cover of the communication connection area back into the inverter.
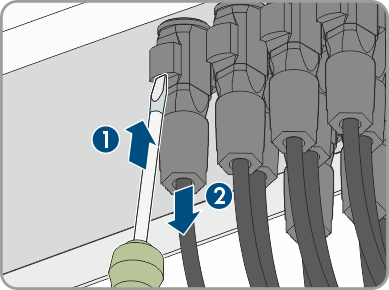
- Remove the DC connectors from the inputs.
- Insert sealing plugs onto the DC inputs.
 CAUTION
Risk of burns due to hot enclosure parts
Also see: