
Connecting the Inverter to the Utility Grid
 Qualified person
Required material (not included in the scope of delivery):
Protective grease (only for conductors made of aluminum)
4 heat-shrink tubings
4 ring terminal lugs with hole diameter 12 mm (for conductors made of aluminum bimetal terminal lugs made of aluminum and copper)
Procedure:
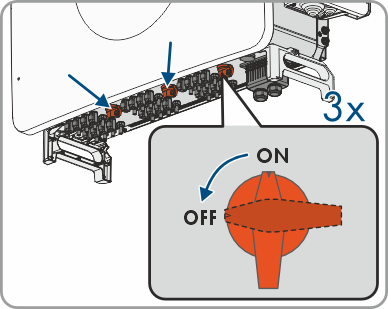
- Disconnect the AC miniature circuit breaker from all 3 line conductors and secure against reconnection.
- Make sure that all 3 DC load-break switches have been switched off and secured against reconnection.
- Open the cable compartment ( > Opening the Cable Compartment).
- Dismantle the AC cable (≤ 375 mm).
If the optional AC sealing plate is used, dismantle all 4 cables. - Strip the insulation of L1, L2, L3, N and the grounding conductor (30 mm).
- For conductors made of aluminum, remove the oxide film and apply protective grease to the conductors.
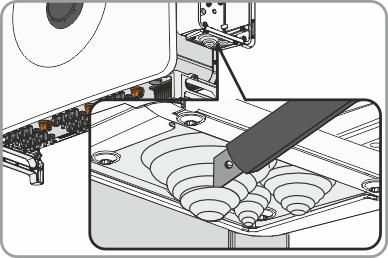
- Cut the sealing plate of the AC connection at the bottom of the inverter according to the cable diameter.
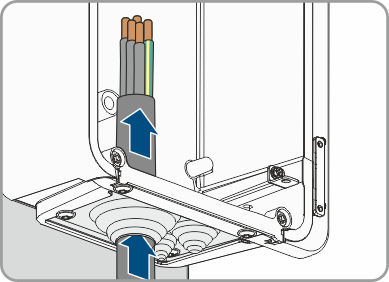
- Route the cable through the sealing plate for the AC connection into the device.
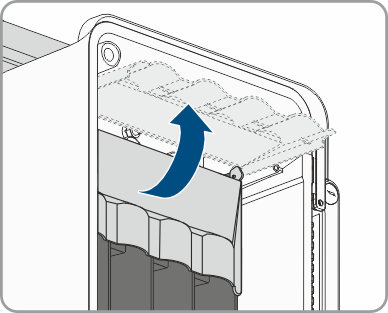
- Open the protective cover.
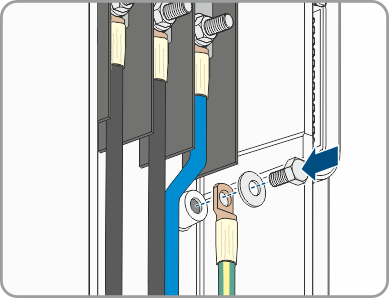
- Pull 1 heat-shrink tubing each over conductors L1, L2, L3, N and the grounding conductor. The heat-shrink tubing must be below the stripped conductor section.
- Place the conductors with ring terminal lugs as labeled for L1, L2, L3, N incl. 1 washer and hex nut each onto the stud bolts (M12, torque: 20 Nm to 30 Nm) at the top. Now tighten it all using a ratchet.
- Place the grounding conductor incl. 1 washer and hex nut onto the stud bolt (M12, tightening torque: 20 Nm to 30 Nm) in the middle section. Now tighten it all using a ratchet.
- Ensure that the AC cable is not under tension.
- Close the protective cover of the cable compartment.
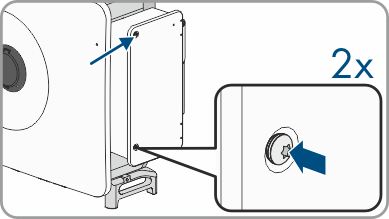
- Move the limiting lever back to its original position and close the cable compartment cover.
- Tighten the 2 screws on the cable compartment cover (TX30, tightening torque: 4.2 Nm to 4.5 Nm).


Also see: