Disassembling the Inverter
Requirements:
Original packaging or packaging suitable for the weight and dimensions of the product must be available.
A pallet must be available.
Mounting material for attaching the packaging on the pallet must be available (e.g. tie-down straps).
All transport handles must be in place.
Procedure:
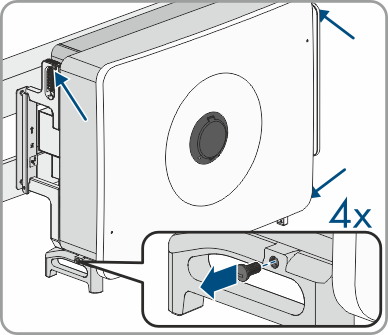
- Remove the sealing screws on the sides of the inverter using a flat-blade screwdriver (4 mm).
- Screw all 4 carrying handles or the eye bolts of the lifting gear into the threaded holes.
- If the inverter is to be unhooked from the mounting bracket using lifting gear, screw the eye bolts into the 2 upper threaded holes on the right-hand and left-hand side of the inverter and attach the lifting gear to them. The lifting gear must be suitable to take the weight of the inverter.
- If the inverter is to be lifted out of the mounting bracket without using lifting gear, screw the carrying handles as far as they will go into the threaded holes on the right-hand and left-hand side until they lie flush with the enclosure. When doing so, ensure that the carrying handles are screwed into the threaded holes so that they are perfectly straight. If the carrying handles are not screwed in straight, this can make it more difficult or even impossible to unscrew them later on and can damage the threaded holes to the extent that carrying handles can no longer be screwed into them.
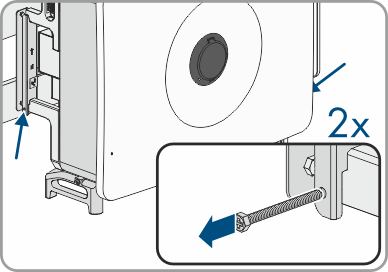
- Remove the hexagon head screws (M6xM65) from the mounting bracket.
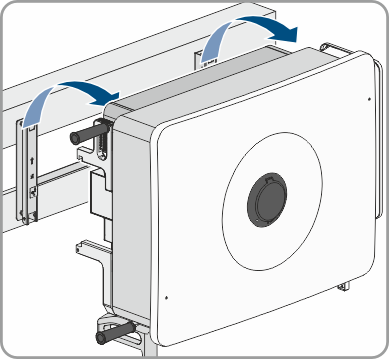
- Unhook the inverter from the mounting bracket.
- If the inverter is to be shipped, pack the inverter according to its size and weight.
- Dispose of the inverter in accordance with the locally applicable disposal regulations for electronic waste.