Mounting the Product
 CAUTION
Risk of injury due to weight of product
Injuries may result if the product is lifted incorrectly or dropped while being transported or mounted.
- Transport and lift the product carefully. Take the weight of the product into account.
- Always have two persons mount and disassemble the product.
- Wear suitable personal protective equipment for all work on the product.
Additionally required mounting material (not included in the scope of delivery):
3 screws, suitable for the support surface and the weight of the inverter (diameter: minimum 6 mm)
3 washers, suitable for the screws (outer diameter: minimum 18 mm)
Where necessary, 3 screw anchors suitable for the support surface and the screws
Procedure:
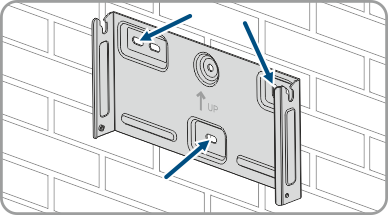
- Align the wall mounting bracket horizontally on the wall and mark the position of the drill holes. Use at least one hole on the right- and left-hand side and the lower hole in the middle of the wall mounting bracket. Tip: When mounting on a post, use the upper and lower central holes of the wall mounting bracket.
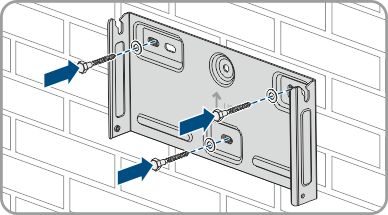
- Set the wall mounting bracket aside and drill the marked holes.
- Insert screw anchors into the drill holes if the support surface requires them.
- Secure the wall mounting bracket horizontally using screws and washers.
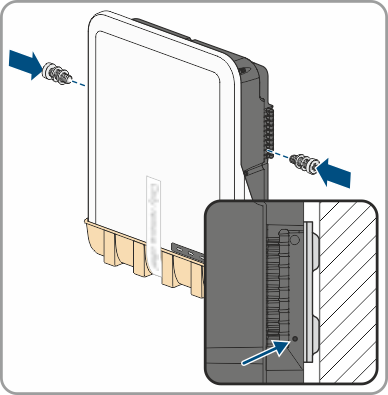
- Hook the inverter into the wall mounting bracket. When doing so, the two right- and left-hand keys on the ribs on the rear side of the inverter must be hooked into the respective keyways in the wall mounting bracket.
- Ensure that the inverter is securely in place.
- Secure the inverter to the wall mounting bracket on both sides with a hexagon head screw (M4x14) provided. Use a magnetized screwdriver to insert a screw into the lower screw hole of the inverter's anchorage bracket and tighten it (PH2, torque: 1.5 Nm).
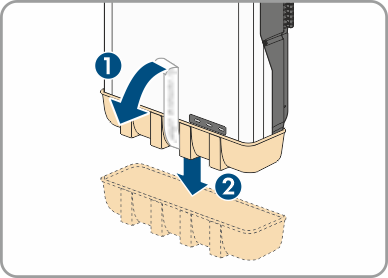
- Remove the protective cover from the connection area.