Connecting the COM Connector
 Qualified person
- Disconnect the AC and backup miniature circuit breaker from all 3 line conductors and secure against reconnection.
- Ensure that the DC load-break switch has been switched off and secured against reconnection.
- Ensure that the battery is switched off.
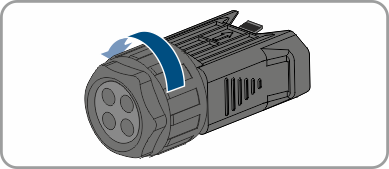
- Unscrew the swivel nut from the threaded sleeve of the COM connector.
- Remove the terminal from the threaded sleeve.
- Connect the CAN communication cable ( > Connecting CAN communication cable).
- Connect signal source to digital input ( > Connecting Signal Source to Digital Input).
- Connect the display device or external fan to the multifunction relay ( > Connecting the Multifunction Relay).
- Ensure that all conductors are plugged into the terminal points tightly by pulling slightly on the conductors.
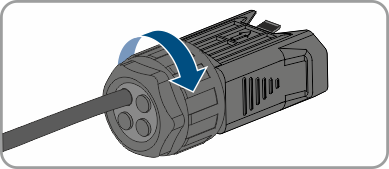
- Insert the terminal into the threaded sleeve. The terminal must snap audibly into place.
- Tighten the swivel nut.
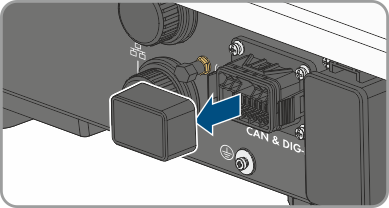
- Remove the protective cap from the CAN & DIG-I/O socket.
- Insert the connector for battery communication connection into the CAN & DIG-I/O socket. The connector must snap audibly into place on both sides.