Commissioning the Product
 Qualified person
NOTICE
Applies only to EVC22-3AC-10: Damage to the vehicle during emergency or battery-backup operation
During emergency or battery-backup operation, three-phase loads may be connected to a single-phase utility grid with phase coupling. This can damage the vehicle.
- Emergency and battery-backup operation must be clarified with and approved by the vehicle manufacturer in advance.
- Ensure that, during phase coupling, only single-phase loads are connected to the battery-backup grid.

Observe the following information about the charging cable
- Always pull the charging cable out of the port by the connector, never by the cable itself.
- The charging cable must not be mechanically damaged (kinked, pinched, or run over) and the contact area must not make contact with heat sources, dirt, or water.
- Never use defective, worn, or dirty charging plugs.
- Do not use extension cord sets.
- Do not use adapters of any kind.
- Follow the information and manuals for your vehicle before using the charging station to charge the vehicle.
- Use the protective cap when the charging cable is not in use.
- Do not put the charging cable under tension. Do not touch the pin contacts.
- Avoid knots in the charging cable.
- Unwind the charging cable all the way when charging.
- The charging cable is a trip hazard when lying on the ground. Store the charging cable properly or use the cable hanger when the charging process is completed.
- The charging cable is a wearing part and must be visually inspected regularly (before each charging process).
Requirements:
The AC circuit breaker must be correctly rated and mounted.
Information: the charging station does not have a dedicated disconnect switch. The miniature circuit breaker in the supply line serves as a disconnect device.The product must be correctly mounted.
All cables must be correctly connected.
The enclosure lid must be mounted.
Procedure:
- Place the enclosure lid slightly tilted on the terminal cover and then close it completely.
- Tighten the screws in the order shown (TX25, torque: 6 Nm ± 0.3 Nm). Finally, retighten the first screw.
- Tighten the 3 screws of the terminal cover in the specified sequence (TX20, torque: 3.5 Nm).
- Wrap the charging cable around the enclosure.
- Close unused enclosure openings with cable glands.
- Ensure that all cable glands have seal inserts and that the seal inserts have not moved.
- Switch on the AC circuit breaker.
- Wait until the product is in operation. The procedure takes approx. 4 minutes. Meanwhile, the current operating state of the product is indicated by the LEDs ( > LED Signals).
- Ensure that the charging station is in fast charging mode.
- Perform the test of the charging station according to IEC 61851 with a suitable measuring device for charging stations. To do this, connect the charging cable to the measuring device.
- Fill out the test report according to IEC 61851. An example of a test report can be found at www.SMA-Solar.com.
- If necessary, rectify any defects found.
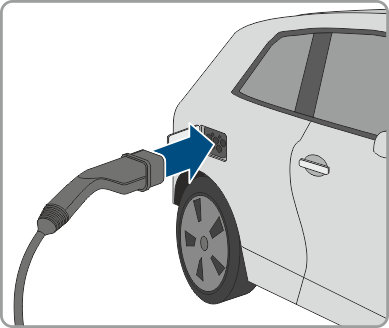
- After successful testing, connect the charging cable to the vehicle.
- All 3 LEDs light up. The start-up phase begins.
- All 3 LEDs go out again after approximately 90 seconds.
- Depending on the available power, the green LED pulses or is continuously illuminated. The vehicle is charged.
- If the green LED is still flashing, the conditions for activating charging operation are not yet met. As soon as the conditions for charging are met, the charging station starts charging the vehicle.
- If the red LED lights up, an event has occurred. Use the event message to find out which event has occurred and, if necessary, initiate countermeasures.
- After charging, disconnect the charging cable from the vehicle and wrap it around the product.