Mounting the Product
Procedure:
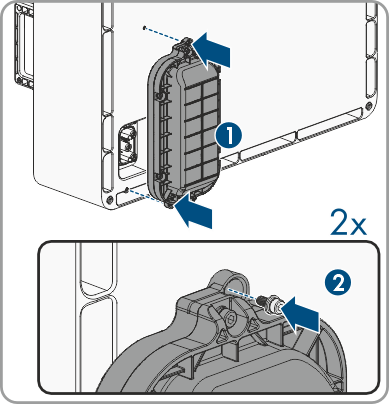
- Mount the U-turn unit on the lowest battery module. To do so, lay the battery module on its side and attach the U-turn unit from below using the 2 screws (M4x10) AF3 (tightening torque 2 Nm).
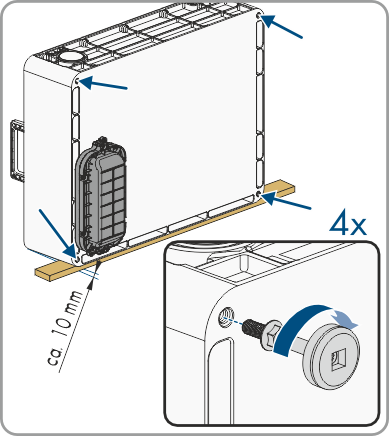
- Place a 10 mm thick bar under the battery module and position it at a slight angle. Then mount the four adjustable feet on the lowest battery module.
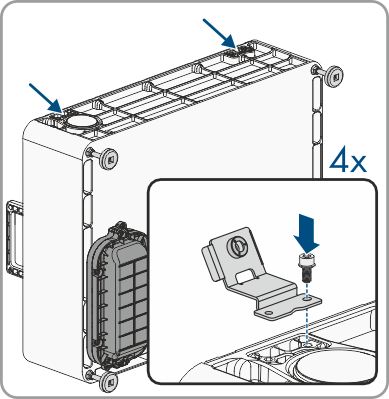
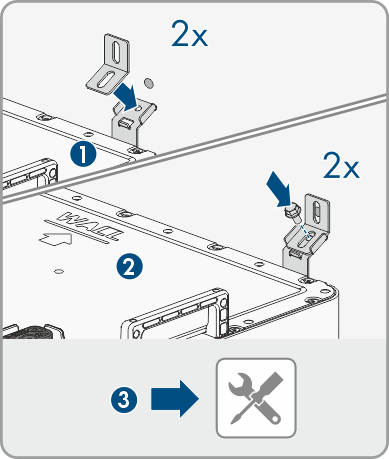
- Attach the two fixing brackets to the lowest battery module using 2 supplied screw and washer assemblies (M4x10, AF3, tightening torque 2 Nm) per fixing bracket.
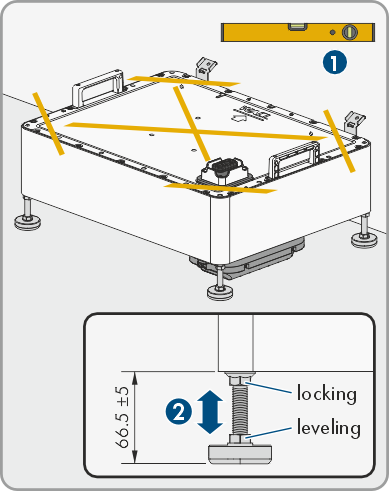
- Push the battery module in front of the wall and level using the adjustable feet (AF15).
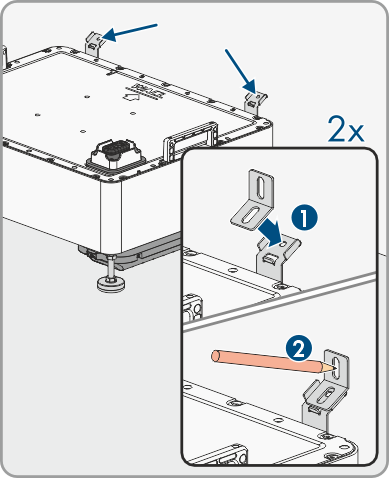
- Hold the two wall mounting brackets to the fixing brackets and mark the positions of the two drill holes. Then move the battery module away from the wall and drill the drill holes.
- Position the battery module back up against the wall and secure it. Attach the two wall mounting brackets to the fixing brackets using the two screws (M6x12, AF10, tightening torque 5 Nm).
- Align the required number of battery modules using the carrying handles and stack them one on top of the next. When doing so, ensure that the modules are aligned correctly.
- The last battery module must be attached to the wall. To do so, attach the two fixing brackets to the uppermost battery module using 2 supplied screw and washer assemblies (M4x10, AF3, tightening torque 2 Nm).
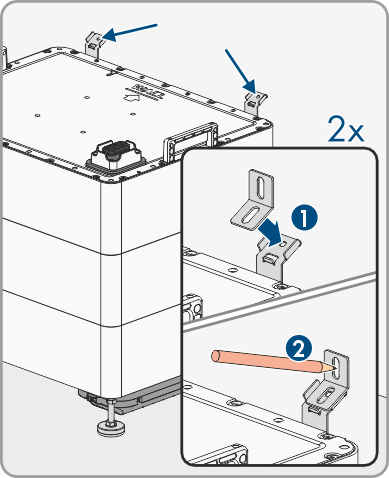
- Hold the two wall mounting brackets to the fixing brackets and mark the positions of the two drill holes. Then remove the uppermost battery module and drill the drill holes. During drilling, protect the remaining modules against dust and dirt.
- Put the uppermost battery module back and attach it to the wall. Attach the two wall mounting brackets to the fixing brackets using the two screws (M6x12, AF10, tightening torque 5 Nm).
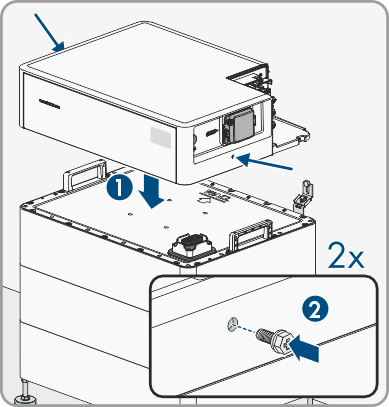
- Before putting the BMS unit into position, ensure that the DC circuit breaker is set to the OFF position.
- Place the BMS unit onto the uppermost battery module and attach using the two screw and washer assemblies (M6x16) on the left and right (AF10, tightening torque 5 Nm).