
Mounting the air duct to the sound absorber
Required mounting material (included in the scope of delivery):
- 1 air duct
- 2 lifting lugs
- 1 mounting plate right
- 1 mounting plate left
- 29 screws M6 for mounting the air duct and the mounting plates
- 9 nuts M6
- 9 washers M6
Requirements:
- At least 2 people are available for mounting the air duct.
- Endless loop straps are used.
- The hoist is properly attached to the crane.
- A traverse and endless loop straps are used. The endless loop straps are long enough so that the traverse does not touch the roof of the product during transport.
- The service covers have been removed from the air duct.
Procedure:
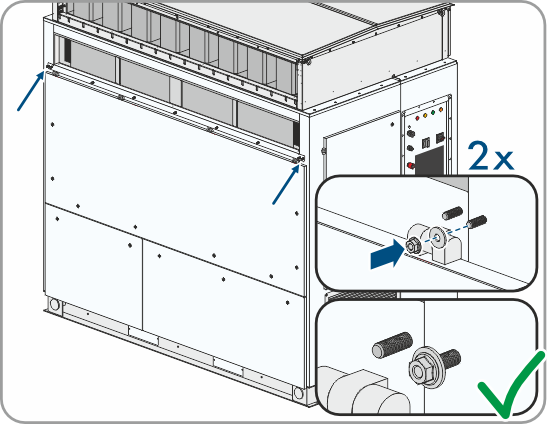
- On the left and right side, mount 1 washer and 1 nut each onto the bolts with 2 to 3 turns on the bolts of the mounting rail below the air inlet opening on the AC side of the inverter. This will prevent the air duct from sliding during mounting.
- Fit the 2 ground straps between the sound absorber and the inverter.
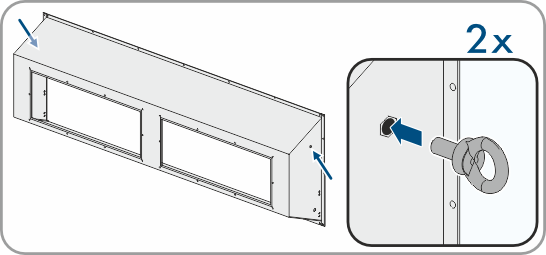
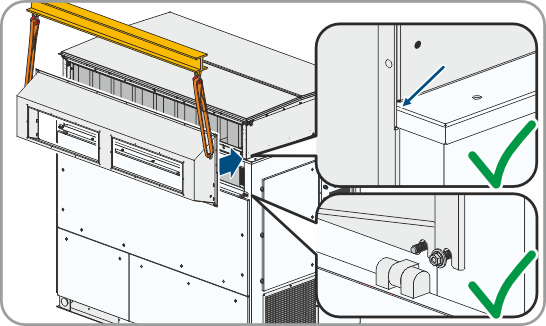
- Mount 2 lifting lugs on the sides of the air duct. At the same time, make sure that the lifting lugs have been fully screwed in and are aligned vertically.
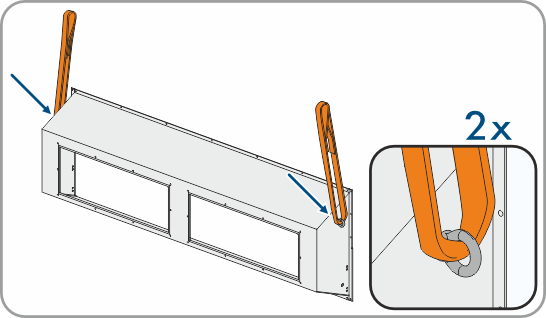
- Attach the endless loop straps to the 2 lifting lugs on the air duct.
- Ensure that the lifting gear is attached correctly.
- Carefully lift the air duct and place it in front of the sound absorber opening on the AC side of the inverter.
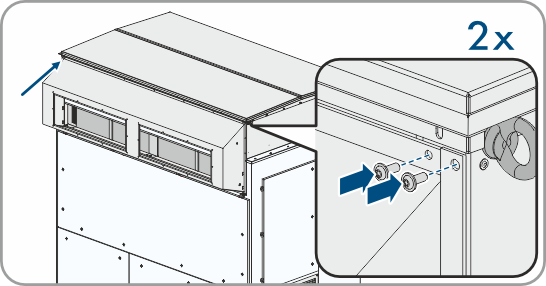
- Align the air duct with the bolts of the mounting rail and carefully place the slotted openings onto the bolts. At the same time, make sure that openings are behind the previously mounted nuts and washers.
- Press the air duct against the sound absorber and ensure that the air duct is installed in such a way that all screw positions can be reached.
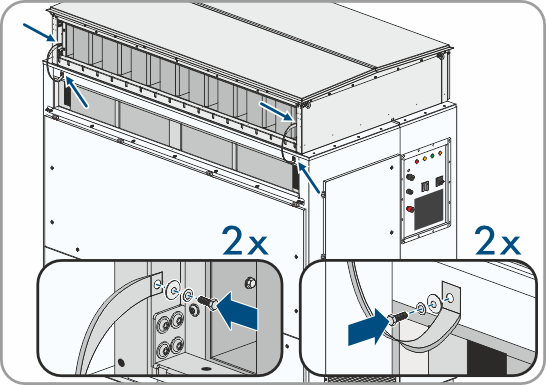
- To secure the air duct to the sound absorber, gently attach the air duct in the middle and to the upper corners using 1 screw and 1 washer each (TX30). If the drill holes in the sound absorber and air duct are not positioned above one another, the air duct can be easily moved with the mounting rail.
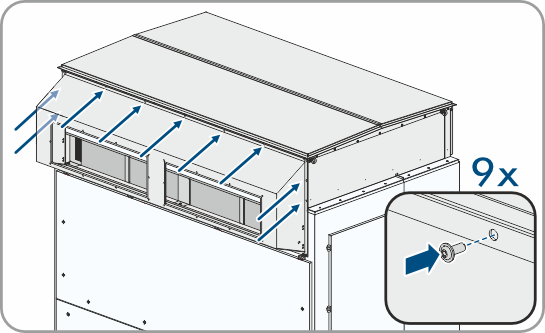
- Completely and gently attach the air duct to the sound absorber using screws on the top and side edges of the sound absorber (TX30).
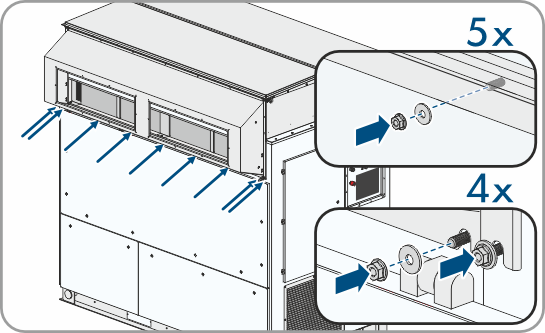
- Attach the air duct to the mounting rail with nuts and washers (AF10).
- Ensure that the air duct lies flat and that all screws are properly in place.
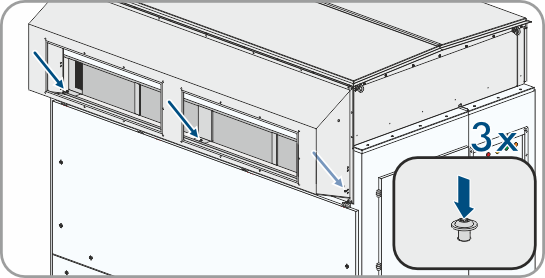
- Tighten the 13 screws on the top and side edges with the correct tightening torque (6 Nm (53 in-lb)).
- Tighten the 3 screws of the mounting rail to attach the air duct with the correct tightening torque (12 Nm (106 in-lb)).
- Tighten the nuts on the mounting rail with the correct tightening torque (6 Nm (53 in-lb)).
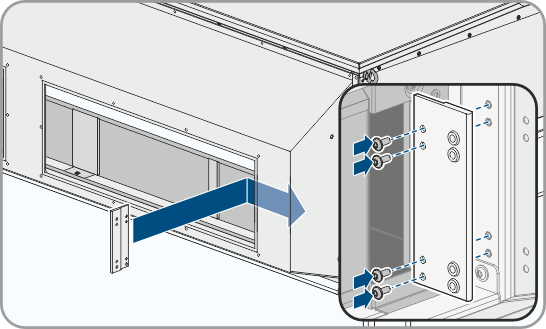
- Attach the mounting plate for the right side in the inverter at the previous position of the hinges of the support brackets using 4 screws (TX30).
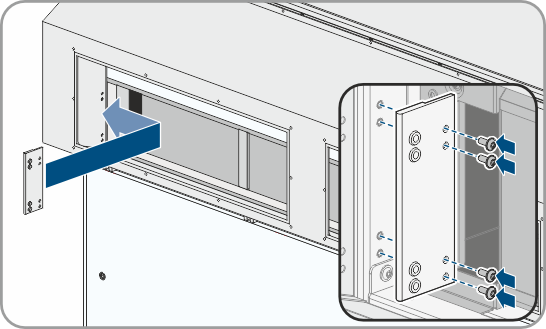
- Attach the mounting plate for the left side in the inverter at the previous position of the hinges of the support brackets using 4 screws (TX30).
- Attach the mounting plates from the outside to the air duct with 4 screws each (TX30).
- Tighten all bolted connections on the mounting plates (TX30, tightening torque: 6 Nm (53 in-lb)).
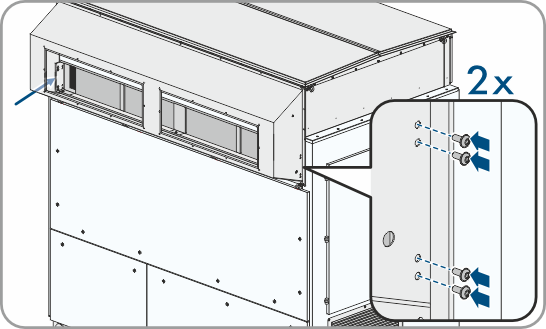
- Mount the service cover ( > Mounting the service covers).
Also see: