Mounting the Sound Absorbers at the Air Outlet
Required mounting material (included in the scope of delivery):
- 1 sound absorber
- Mounting frame, consisting of 2 parts (mounted to the sound absorber)
- 1 ground strap
- 1 screw M8x20 (stainless steel)
- 1 nut M8 (stainless steel)
- 2 washers M8 (stainless steel)
- 8 screws M6
Procedure:
- Make sure that the inverter has been disconnected (see the inverter manual).
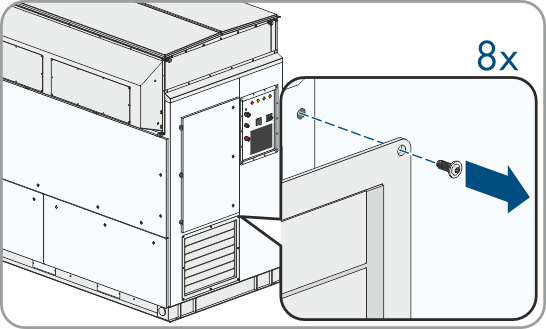
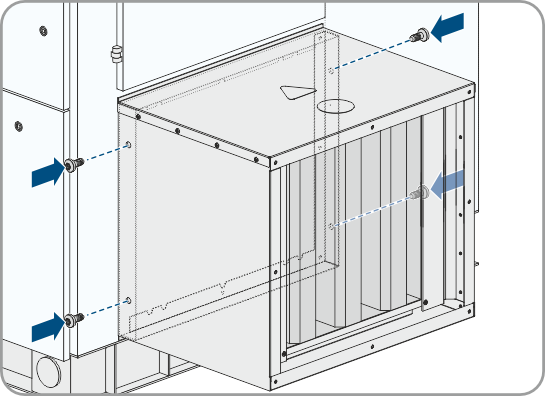
- Remove the screws from the air outlet grid (TX30) and keep the screw material for mounting.
- Slightly pull the air outlet grid forwards.
- Remove the ground strap of the air outlet grid in the inverter (AF13), take off the air outlet grid and keep the screw material for mounting.
- Remove any dust deposits from the area behind the air outlet grid.
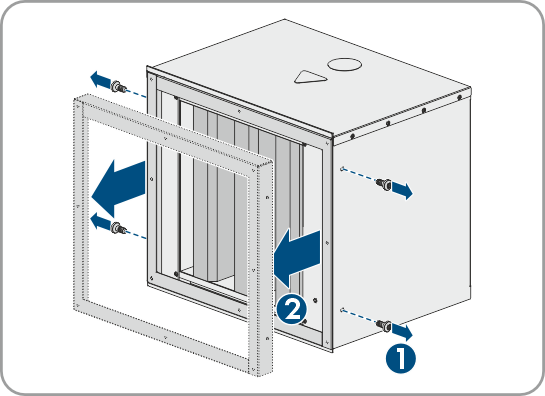
- Remove the mounting frame from the sound absorber. To do this, remove the lateral screws (TX40) and take off both frame parts.
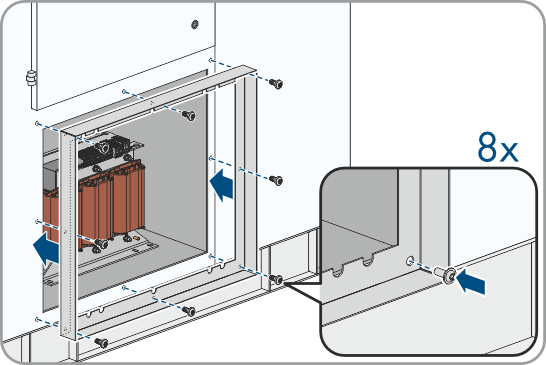
- Mount the mounting frame to the inverter (TX30, tightening torque: 6 Nm (53 in-lb)).
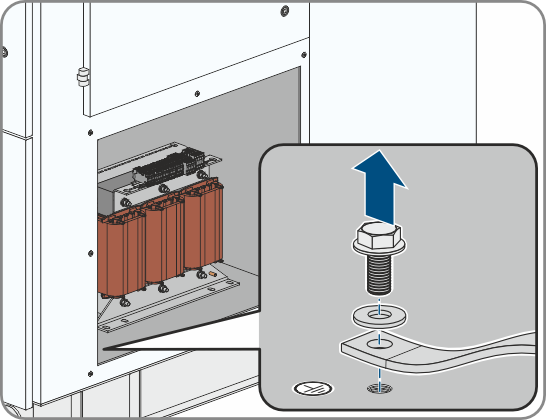
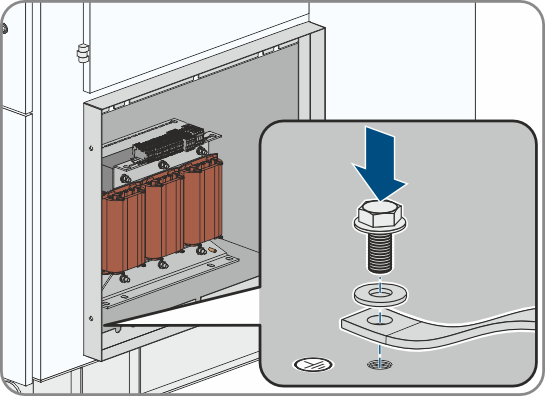
- Attach the ground strap from the scope of delivery to the inverter using a screw (M8x20) and washer (M8) (tightening torque: 15 Nm (132.8 in-lb)). Use the material from the disassembly.
- Position the sound absorber laterally on the air outlet.
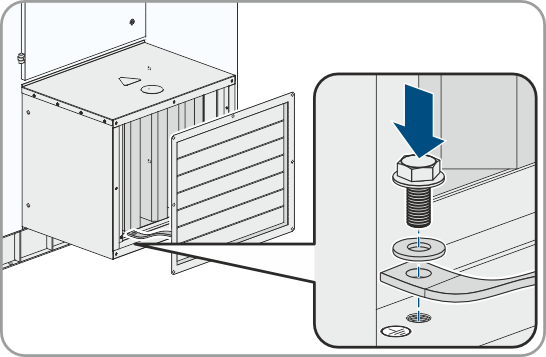
- Mount the ground strap with screw and washer using a socket wrench with extension on the sound absorber (tightening torque: 15 Nm (132.8 in-lb)).
- Lift the sound absorber in front of the air outlet, push it onto the mounting frame and align with the inverter.
- Mount the sound absorber to the inverter (TX40, tightening torque: 18.0 Nm (159 in-lb)). Ensure that the upper edge of the sound absorber is in close contact with the inverter. This prevents the ingress of dust and moisture.
- Position the ventilation grid on the air outlet.
- Mount the ground strap from the ventilation grid with nut (M8, stainless steel) and washer (M8, stainless steel) to the sound absorber (tightening torque: 15 Nm (132.8 in-lb)).
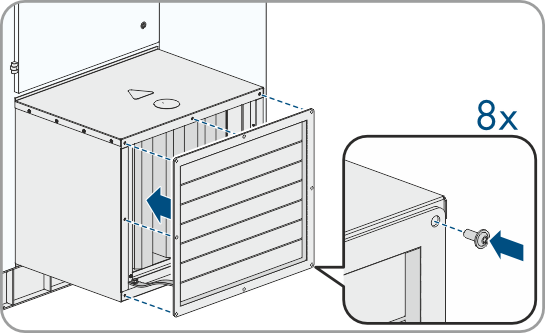
- Mount the ventilation grid to the sound absorber (TX30, tightening torque: 6 Nm (53 in-lb)). Use the material from the disassembly and make sure that the ventilation slats are aligned horizontally and closed when the inverter is switched off.