
Replacing the Product with a Replacement Device
 Qualified person
Under fault conditions, the product may need to be replaced. If this is the case, you will receive a replacement device from SMA Solar Technology AG. If you received a replacement device, replace the defective product with the replacement device as described below.

Transport lid on the replacement device
The enclosure lid of the replacement device can be a transport lid (see info on the enclosure lid). In this case, the transport lid must be exchanged for the enclosure lid of the defective product. The procedure for this is described below at the relevant point.
Procedure:
- To simplify the configuration of the replacement device, save the configuration data of the defective product to a file.
- Disconnect the product connections of the defective product .
- Disassemble the defective product ( > Disassembling the product).
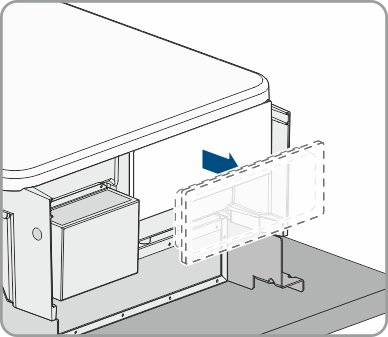
- Remove the transport cover, which is located in the enclosure opening of the replacement device instead of the connecting plate, and use it for the defective product.
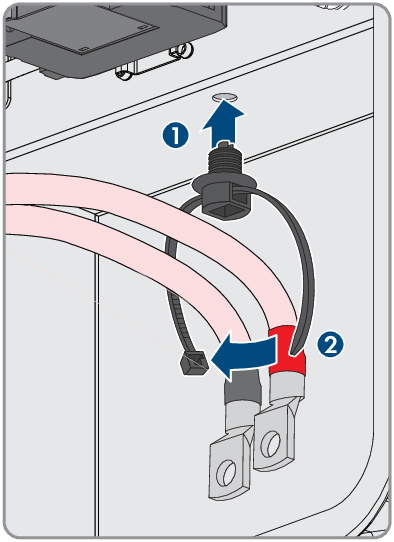
- Secure the pre-configured DC connection cables in the defective product for transport. To do so, screw the supplied cable tie into the hole below the DC surge protection devices and place and tighten the cable tie around the DC connection cables.
- Mount the replacement device and make the electrical connections as described in this document. Use the connection plate and the DC protection elements against contact of the defective product.
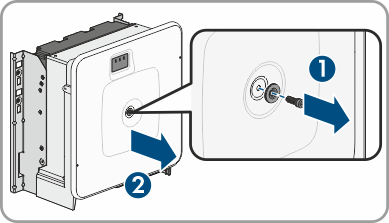
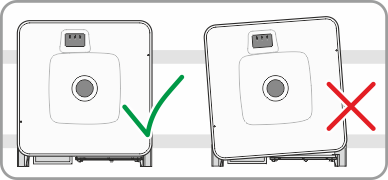
- If you have to replace the enclosure lid: Remove the cover from the enclosure lid.
- If you have to replace the enclosure lid: Unscrew the screw on the enclosure lid (hex socket, AF8) and remove the enclosure lid.
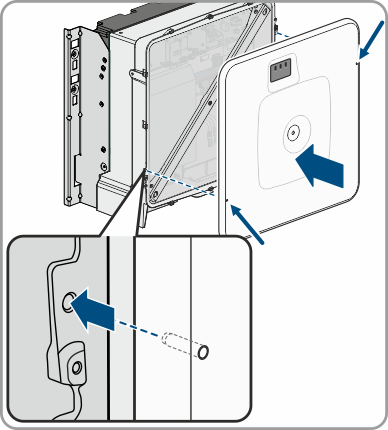
- If you have to replace the enclosure lid: Carry out the following 4 steps.
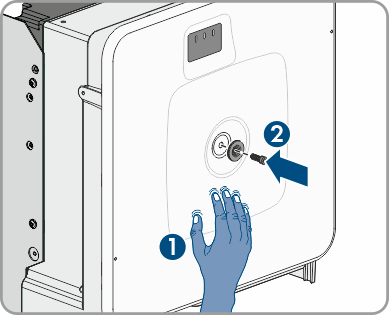
- Position the enclosure lid. The two guide pins on the enclosure lid must slide into the guide openings on the enclosure lid.
- Ensure that the cover sits straight on the enclosure.
- Hold the enclosure lid pressed against the enclosure and screw and tighten the screw (hex socket AF8, torque: 18 Nm).
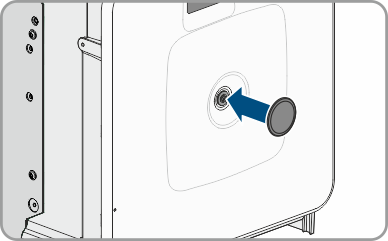
- Place the cover on the screw in the enclosure lid.
- Establish a connection to the user interface.
- On the Configure inverter page, select the Adopt the configuration from a file configuration option and load the saved configuration file of the defective product .
- If the defective product had been registered by a communication product, replace it with the new product in the communication product.
- Pack the defective product in the packaging of the replacement device.
- Fasten the packaging to the pallet on which the replacement device was supplied using the reusable lashing straps.
- Arrange for pick-up by SMA Solar Technology AG.
Also see: