Disconnecting the Inverter from Voltage Sources
 Qualified person
Prior to performing any work on the inverter, always disconnect it from all voltage sources as described in this section. Always adhere to the prescribed sequence.
Procedure:
- Disconnect the AC circuit breaker and secure it against reconnection.
- If the battery has a load-break switch, then switch it off (see the documentation of the battery manufacturer).
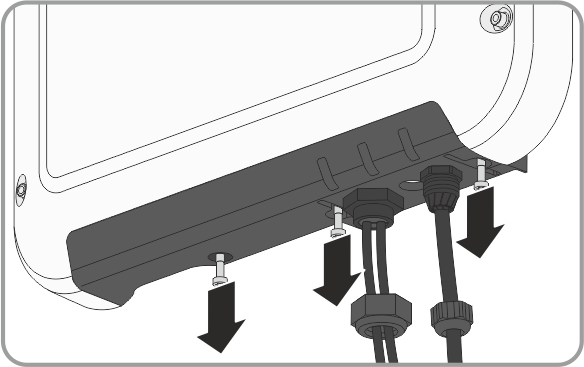
- Unscrew the swivel nuts from the cable glands on the connection cap.
- Unscrew the screws of the connection cap with a Torx screwdriver (TX 20) and remove the connection cap towards the bottom.
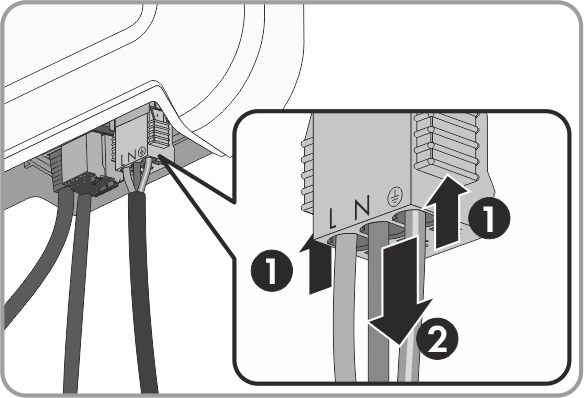
- Ensure that no voltage is present between L and N and L and on the terminal block for the AC connection using a suitable measuring device. To do so, insert the test probe (maximum diameter: 2 mm) into each round opening of the terminal block.
- Release and disconnect the terminal block using the sliders located at the side.
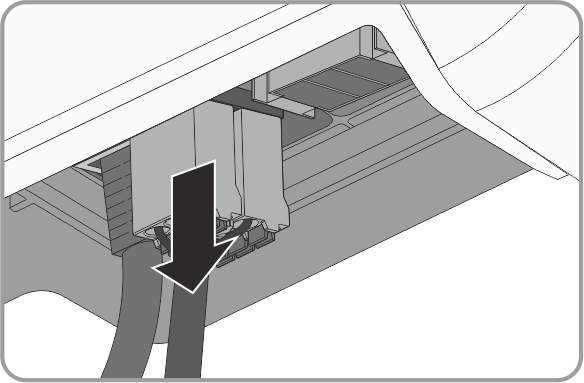
- Remove the plug with the battery communication cable.
- Release and remove the plug of the network cable.
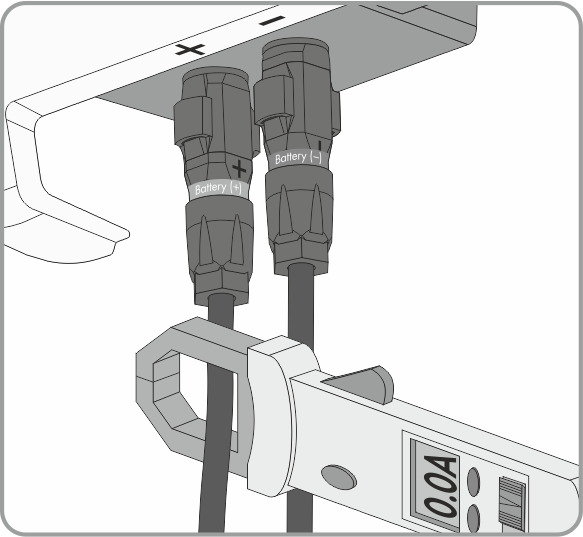
- Use a current clamp to ensure that no current is present in the DC conductors.
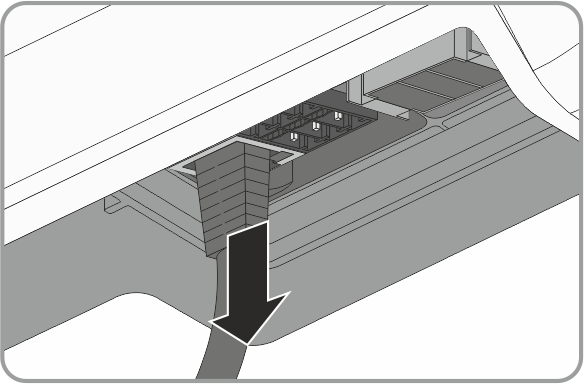
- Release and remove the DC connectors. To do this, insert a flat-blade screwdriver or an angled screwdriver (blade width: 3.5 mm) into one of the slide slots and pull the DC connectors out in a downward direction. Do not pull on the cable.
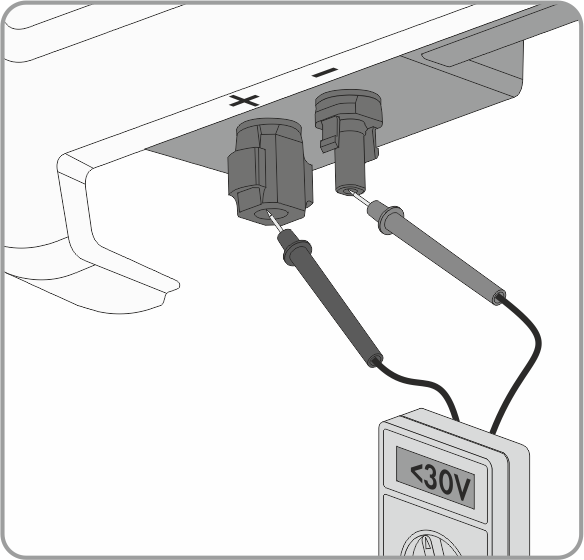
- Ensure that no voltage is present at the DC inputs on the inverter using a suitable measuring device.