
Removing the Fan Assembly
 Qualified person
- Disconnect the inverter from voltage sources and secure it against being switched on again ( > Disconnecting the Inverter from Voltage Sources).
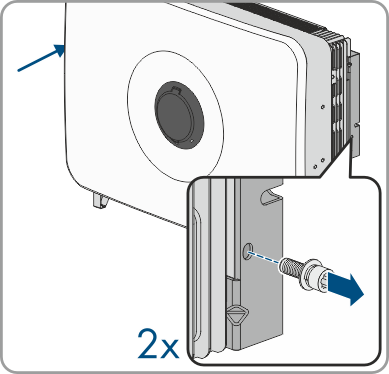
- Loosen the 2 screws of the mounting bracket (TX30, tightening torque: 3 Nm).
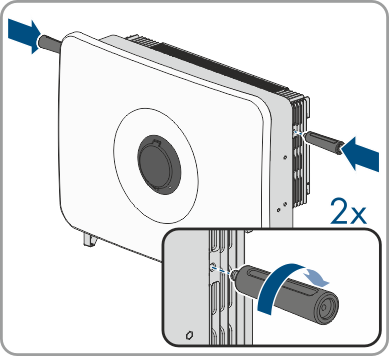
- Screw the transport handles as far as they will go into the tapped holes on the right- and left-hand side until they lie flush with the enclosure. When doing so, ensure that the carrying handles are screwed into the threaded holes so that they are perfectly straight. If the carrying handles are not screwed in straight, this can make it more difficult or even impossible to unscrew them later on and can damage the threaded holes to the extent that carrying handles can no longer be screwed into them.
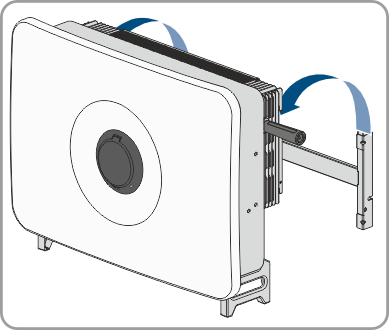
- Unhook the inverter from the mounting bracket.
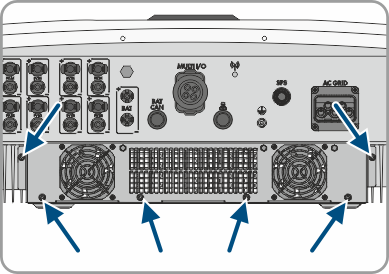
- Unfasten the 6 screws (M5x12) of the fan assembly.
- Pull the fan cassette out of the inverter.
- To release the cable connection, press the clamping bracket together to unlock and pull the cable connection apart.
- Clean Cleaning or replace the fan cassette if necessary.
Also see: