Wall Mounting
 Qualified person
Additionally required material:
2 screws that are suitable for the support surface and the weight of the automatic transfer switching device
2 washers that are suitable for the support surface and the weight of the automatic transfer switching device.
Where necessary, 2 screw anchors suitable for the support surface and the screws
Requirements:
To avoid overheating, do not install the automatic transfer switching device where it is exposed to direct solar irradiation, or it must be protected from direct solar irradiation by appropriate measures.
Procedure:
- Set the position for the automatic transfer switching device. Consider the possible cable route. The automatic transfer switching device can be installed to the right or left of the inverter, or under the inverter. SMA Solar Technology recommends installing the automatic transfer switching device under the inverter.
The automatic transfer switching device must be mounted on a sufficiently load-bearing and closed wall. - Align the wall mounting bracket horizontally on the wall and mark the position of the drill holes.
- Set the wall mounting bracket aside and drill the marked holes.
- Insert screw anchors into the drill holes if the support surface requires them.
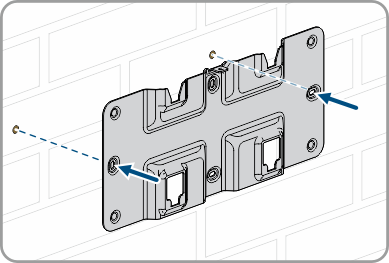
- Secure the wall mounting bracket horizontally using screws and washers.
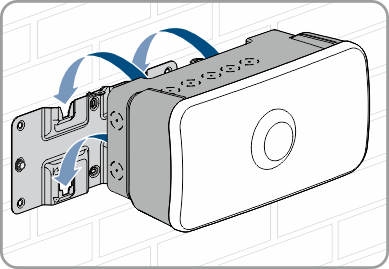
- Hang the automatic transfer switching device onto the wall mounting bracket from above.
- Make sure that the automatic transfer switching device is correctly mounted on the wall mounting bracket.
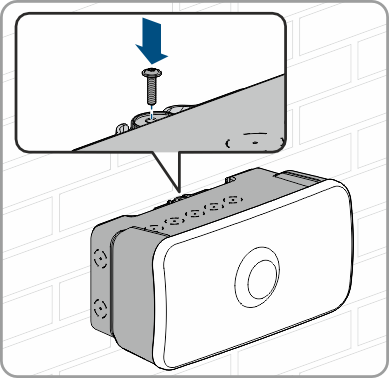
- Insert the supplied screw (M4x16, TX20) into the hole to secure the automatic transfer switching device to the wall mounting bracket and tighten the screw.